6: Sending with Turboplayer
Play your show playlist with the Digas Turboplayer
1: Create your show and playlist (DigAIRange)
2: Add content to your playlist pool
3: Add your show to Turboplayer
4: Prepare the studio (Solo sending or connected studios)
6: Sending with Turboplayer
Extras:
Prepare Turboplayer: Open Multiplayer app and Turboplayer
OBS!
The Multiplayer app must be running before you can use Turboplayer. This app allows Turboplayer to access the playlists and playback channels.
- The app icons are on the Desktop, the Windows Start menu and the Taskbar. Use any of them.
- Click on the Multiplayer app icon first. (Turboplayer will not start)
- If an admin screen asking for approval to make changes appears, click OK.
- Click on the Turboplayer app icon.
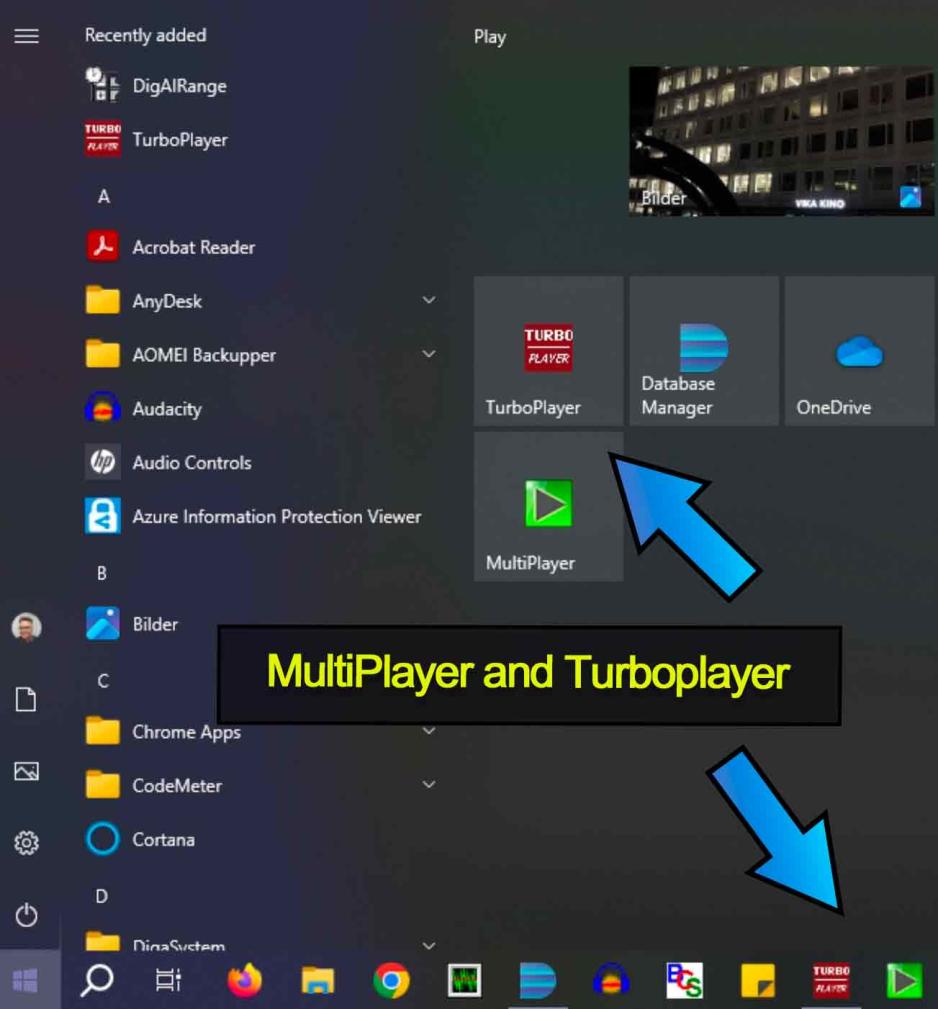
Turboplayer will open and display the current sending time and any playlist scheduled for that time.
Open your playlist in Turboplayer
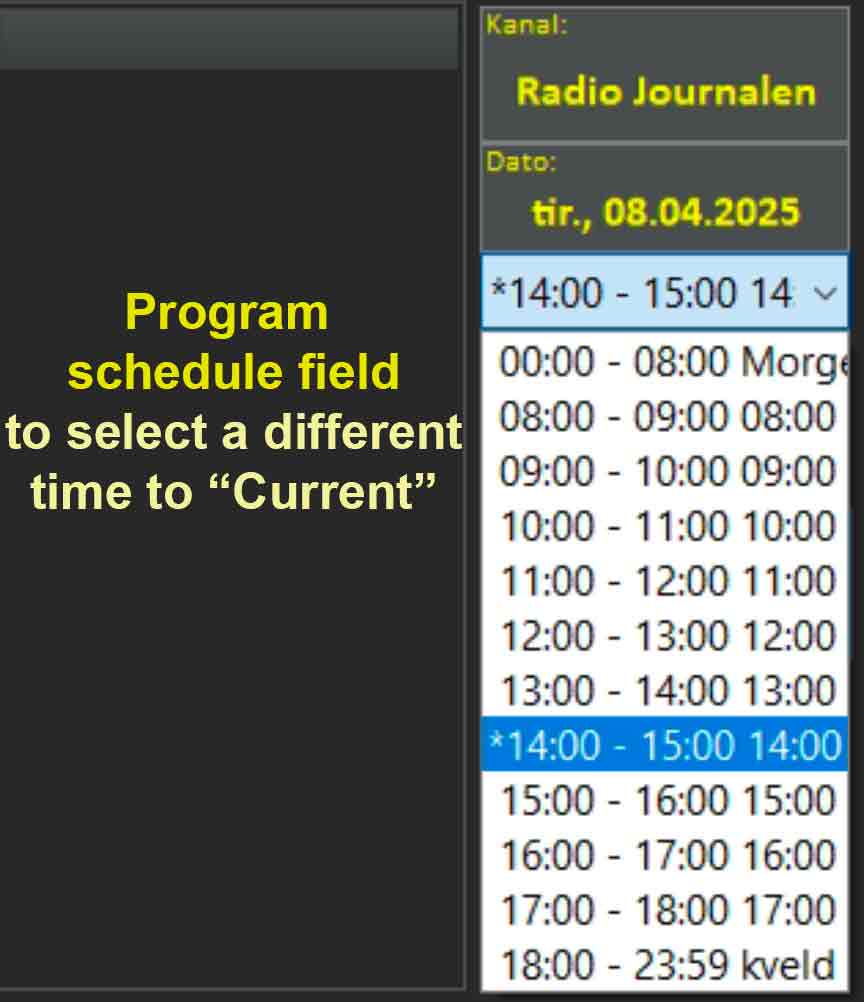
Turboplayer displays the current sending time in 1 hour blocks. If there is a playlist scheduled in that time block, it will automatically be visible and ready for playback
Different sending times can be shown. Click on the Program or Date button to select the desired date and time to display the scheduled playlist for playback. (This includes previous hours, days, weeks, osv.)
Digas channels to play your show playlist
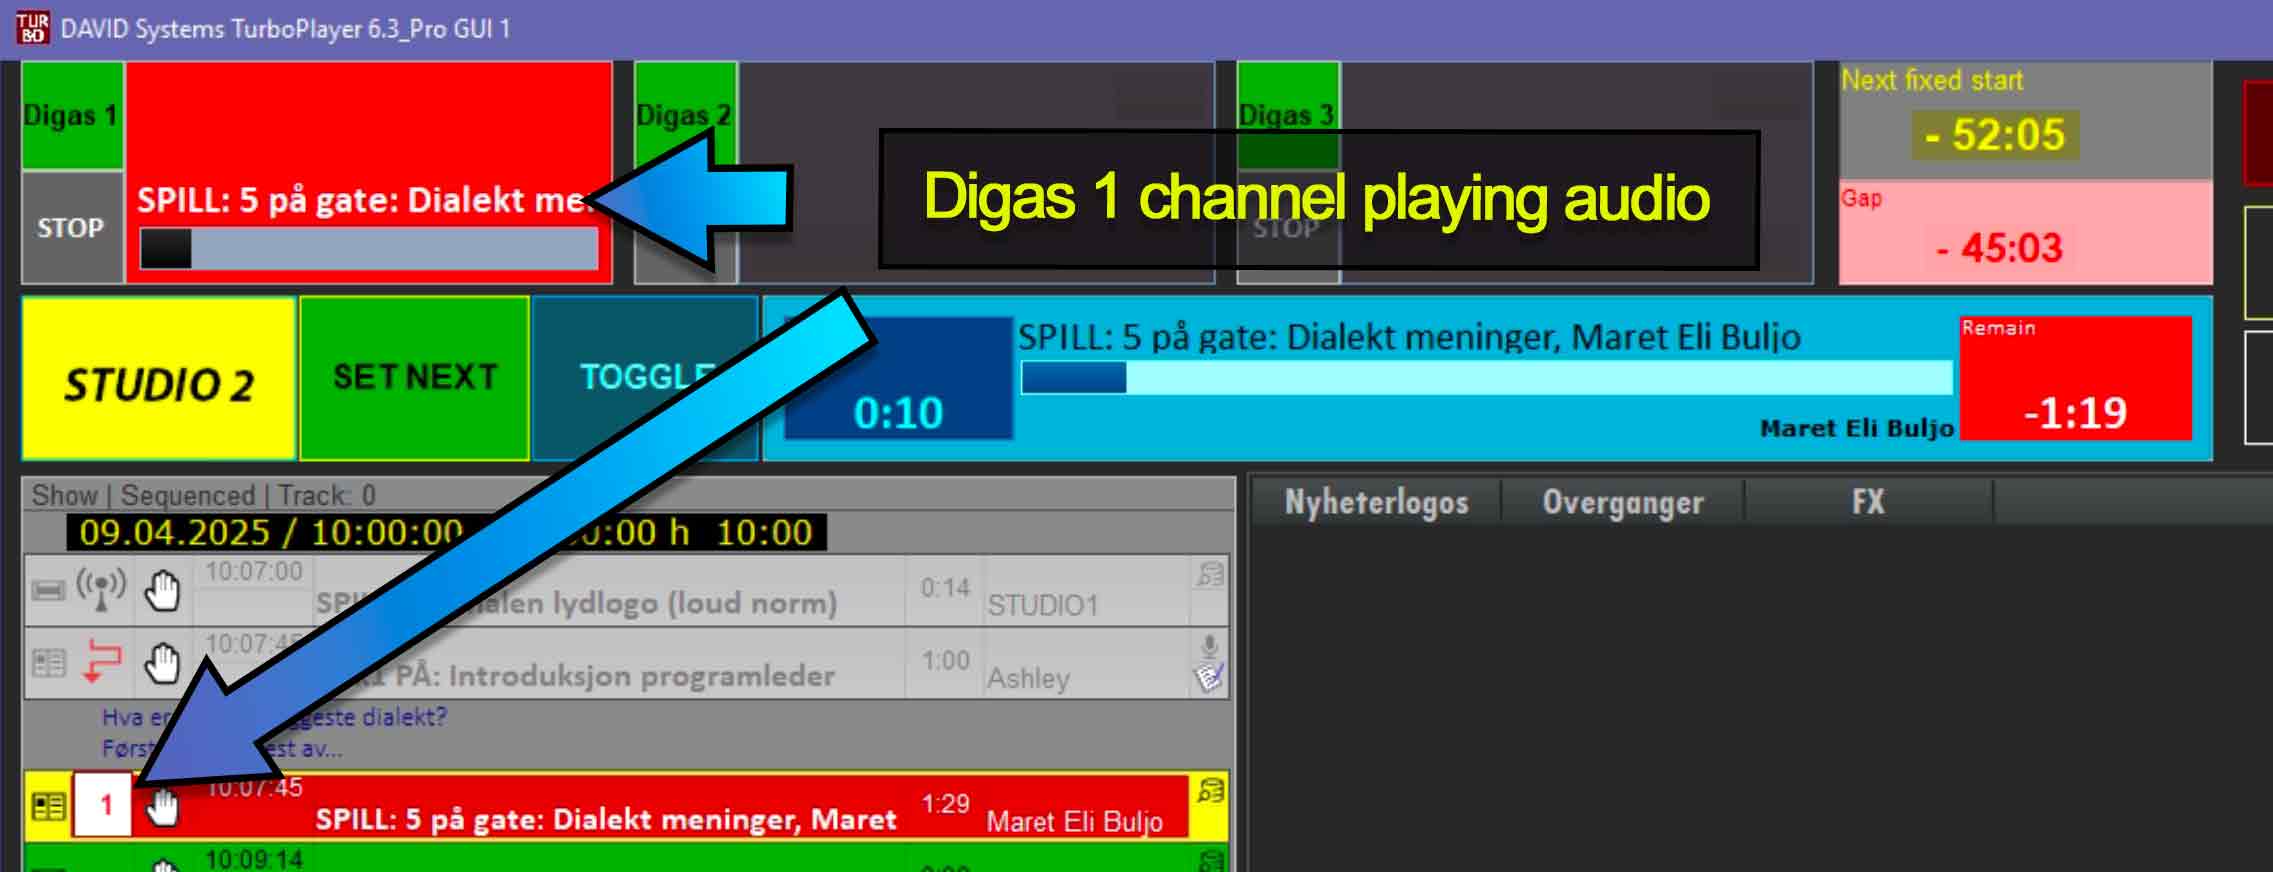
Digas offers 3 playback channels to choose from for flexibility when you play your show playlist. (Such as "DJ-ing" multiple overlapping sound items) You can see these channels at the top of Turboplayer, Digas 1 Digas 2 and Digas 3.
You could play up to 3 different sound items AT THE SAME TIME using the 3 different Digas channels. This can be useful for "overlapping" the end of one item and the start of another
In a normal show / podcast sending, only 1 Digas channel is needed for playing audio items in your playlist.
Use ANY of the 3 channels. They ALL start playback of the next audio (green) item from the playlist. Like a room with three light switches that all control the same light, use the one that is most convenient for you!
Playlist playback with keyboard or mouse
- Play via Digas 1 channel - Spacebar / mouse click Digas 1 button
- Play via Digas 2 channel - B key / mouse click Digas 2 button
- Play via Digas 3 channel - H key / mouse click Digas 2 button
Soundboard Jingles, FX and melodies play
- Play via mouse click / Function key shortcut (F1, F2, F3, osv.)
- Activate a Jingle or FX tab by clicking on its name (Nyheterlogos, Overganger, FX)
- ALL soundboard audio is played through the mixer using Digas 3 channel. If that channel is turned off on the mixer, you will not hear any sound!
- You can create and add your own soundboard groups to your sending in DigAIRange.
Tips and troubleshooting for better playback
- Studio speak objects (LIVE programleader and guests) do not "play" as they are not pre-recorded audio items. Pressing a play key will always jump to the next audio item (coloured green)
- Your audio items should be edited to the exact playback length needed, so that you do not need to manually stop playback. This will save you extra work monitoring the playback of audio items.
- Playback can be stopped by pressing the same channel key a second time / clicking the same channel button a second time.
- Stopping playback does not pause. It ends playback of that item and moves to the next audio item in the playlist. (Oooopss... see Reset a played item with Set Next if you did this by accident).
- Playback can be ended with a 4 second fade out by pressing Shift+ the channel key / mouse click channel button of the playing channel. This works for playlist items and soundboard elements.
Advanced skills
Reset a played item with Set Next
The Set Next button is used to manually set the next audio (green) item to be played.
If you accidentally started playing an item, then stopped it, you need to restore it to your list ready for playback;
- Click on the item to be reset (Yellow outline will surround it)
- Click Set Next to restore it as the next audio (green) item for playback.
(You may need to then drag it into a more correct position within your playlist, but it will always be the next audio item to play)
Skip an item from your playlist with Toggle
To skip an audio object in your list;
- Click on it to select (Yellow outline will surround it)
- Click Toggle. The object will become "grey" with a detour arrow to indicate that it has been dropped.
Toggle can be reversed by clicking on the object and clicking Toggle again
IF YOU HAVE ALREADY PLAYED PAST THE OBJECT AND WISH TO RESTORE IT: Use Set Next.
Rearrange / Reorder your playlist during your show
All items in your playlist, audio and studio, can be dragged and dropped into a different play order.
Preview an audio item during your show
You can can preview-listen to an audio item, without sending it. Use the PFL function. Pre Fader Listening does not send the sound to your show or recorder
(Mixer must be set with the PC Lyd channel OFF, its PFL button (yellow) ON.)
Preview with PFL uses the internal speaker on the mixer board, volume controlled with the Cue knob.
DO NOT use if microphones are turned on. The sound will be picked up and recorded by any "hot" microphones close to the mixer.
(Studio 2 when acting as the control room for Studio 1 does not have this restriction. Preview whenever you wish.)
- Click on the audio item in the playlist to be previewed then use the PFL buttons:

- PFL start will play from the start of the audio item.
- PFL end will play the final 5 seconds of the item.
- PFL stop will end the preview playback.
