5: Record your sending
Activate the recorder and save your recording
1: Create your show and playlist (DigAIRange)
2: Add content to your playlist pool
3: Add your show to Turboplayer
4: Prepare the studio (Solo sending or connected studios)
5: Record your show
Extras:
Record with Digas
- Open DBM (Digas Database Manager)
- Click on Råstoff catalogue
- Click the
 icon on the Digas toolbar
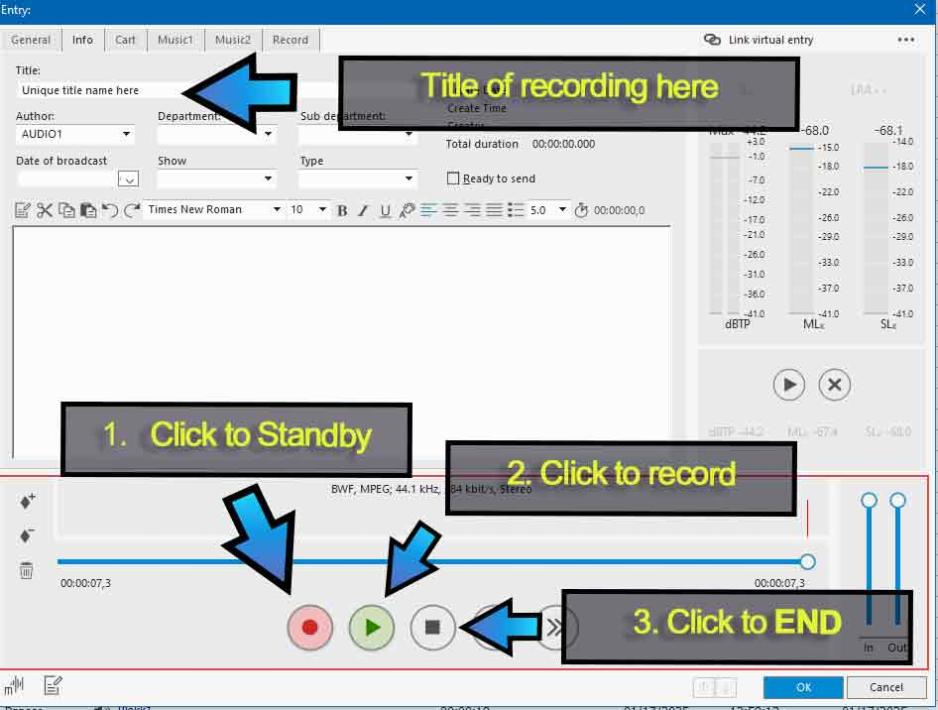
 - Give your recording a unique name in the Title field
- Click on the RED circle button. You are now in STANDBY mode, with a blinking red border to indicate you are ready to record.

Foto:
Journalen redaksjon
- Click on the GREEN triangle (play) button. The red border will now be steady red and a timer will start. You are now recording from all active microphones and other mixer channels that are turned on.
- Make your recording.
- Always speak to the "tip" of the mic, never the sides.
- The "level" of sound you are recording should be peaking at around the -15 / -10 on the level indicator on the mixer panel.
- If it is too low, push the fader up for your mic channel to increase the level.
- Mouth to mic distance should not be more than 20cm. Make a fist and put it between your chin and the mic tip. This is the correct distance.
- To end the recording click on the BLACK square button (stop).
- Click on OK to save it to the Råstoff catalogue
- TURN OFF all the microphones (ON-OFF buttons/slide faders all the way down, ON AIR lamp extinguished)
- See the Digas manual for more.
