Audio, Studio og Digas-hjelp

OPPDATERT des. 2024: Her finner du tips, triks og gode audioeksempler.

Digas audio

Digas audio, Zoom recorders, use of studio equipment and more.

H1 & H1n Zoom opptakerere

Det er nok langt bedre å spørre en voksen om hjelp til å forstå opptakeren, men om du er i knipe finner du bruksanvisningen her:

H1 Zoom Quick Start Guide (PDF)

H1n Quick Start Guide (PDF)

H1 Zoom video tutorial

H1n Zoom video tutorial

H1n tutorial

iPhone som opptaker med Taleopptak (ikke anbefalt metode)

Fra iPhone 6 framover, det er helt ok som opptaker, selv BBC bruker dem til audio oppdrag. Tips fra BBC om hvor man gjør det. (OBS! Røde Reporter app er mye bedre som opptaks alternativ, men videoen har mange gode tips.)

iPhone og Android som opptaker med Røde Reporter app (anbefalt metode)

Gratis Røde Reporter app fra App store og Google Play
(Ellers søk Rode Reporter)

Brukes med eller uten eksterne mik. (FOTO: Røde pressebilde)

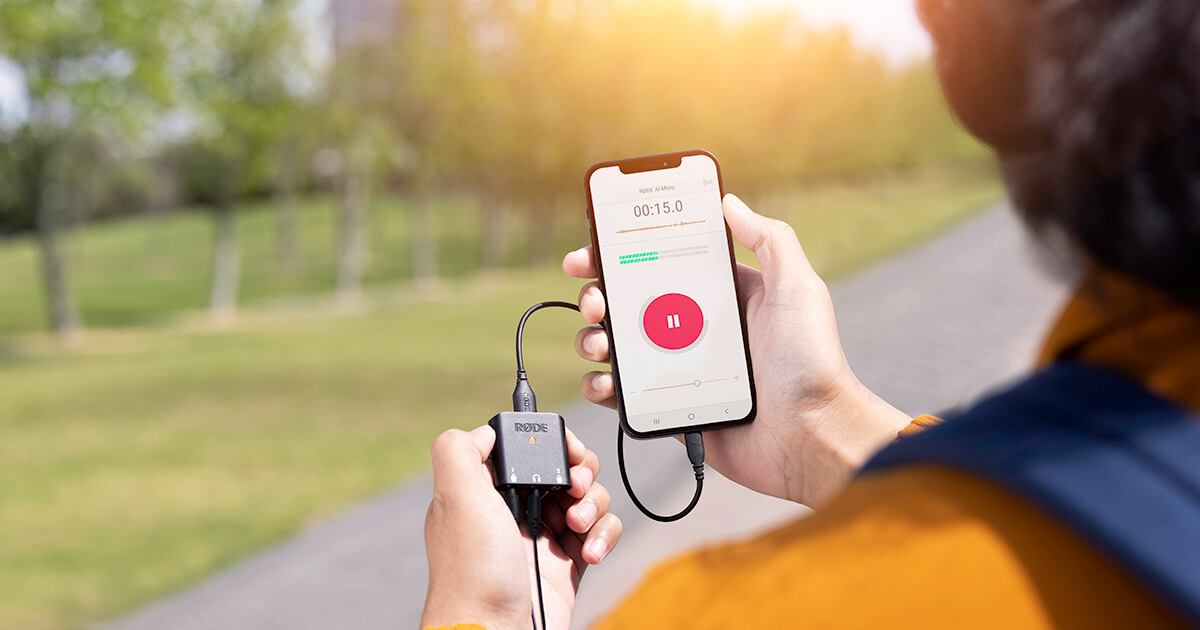
Anbefalt hvis mobilen er hoved opptakeren. Ser like ut på iOS og Android. Veldig lett og trenger kun en liten innstillinger endring;
Settings> Quality > Standard (WAV format)


Digas

Du har råfilene klare og skal starte på redigeringsprosessen, men får ikke logget inn? Fortvil ikke, hjelpen er nær.

Første steg: Logg in (alle Windows PC i R519)

Bruk student ID og passord som vanlig

Andre steg: Logg in i Digas

Dobbelklikk på "Starting DigaSystem"

Digas-manual

I hvert av redigeringsrommene skal det ligge en perm som forklarer hvordan du redigerer. Hvis du heller vil lese manualen på skjerm, vær så god:

PDF-en (som også ligger i permer på Digas-rommene) finner du HER

OBS! "File>Save as database project" frequently! Nothing is saved automatically and your work will be lost if there are network problems or a contact break with the main Digas server!!

Import og konvertering fra iPhone til Digas

Bruk OneDrive og Audacity* for import og konvertering av dine filer.

*Audacity konvertering trengs ikke hvis filene er allerede .WAV format fra Røde Reporter app


Studio 1 and Studio 2:
Record a block and playback

Need to record a vocal block, mobil interview or a podcast?

Setup for basic recording Studio 1 & 2

  • Activate PC lyd mixer channel 1(slide the fader to the "0" position OR press ON-OFF button)
    • This turns on sound for playback through headphones and the speakers.
    • Sets up the system for recording from any PC source like YouTube, NRK osv.
Studio mixer right side
PC Lyd is set to "ON" Press the ON-OFF button or slide the fader up to "0"


  • Activate your microphone (S1Mic1 studio 1, 4S2Mic3 studio 2)” for personal recording.
    • Press the ON-OFF button OR slide the fader to the "0" position.
    • The red "ON-AIR" lamp will illuminate over the interstudio window and outside, above the entrance to the studio
  • Activate any other Mic channels for more participants in the recording.
    • Press the ON-OFF button OR slide the fader to the "0" position.
Studio mixer left
Eks. 2. Slide the fader to "0"/press ON-OFF button for the microphone channel(s) you need. This example is Mic 3 in studio 2
  • Put on your headphones,
  • Adjust the volume of your headphones if needed 3(Headphones dial on the mixer board)
  • You are ready to record.

Record with Digas

  • Open DBM (Digas Database Manager)
  • Click on Råstoff catalogue
  • Click the +Microphone icon on the Digas toolbar
  • Give your recording a unique name in the Title field
  • Click on the RED circle button. You are now in STANDBY mode, with a blinking red border to indicate you are ready to record.
  • Click on the GREEN triangle (play) button. The red border will now be steady red and a timer will start. You are now recording from all active microphones and other mixer channels that are turned on.
  • Make your recording. Always speak to the "tip" of the mic, never the sides. The "level" of sound you are recording should be peaking at around the -15 / -10 on the level indicator on the mixer panel. If it is too low, push the fader up for your mic channel to increase the level. Mouth to mic distance should not be more than 20cm. Make a fist and put it between your chin and the mic tip. This is the correct distance.
  • Click on the BLACK square button (stop) to end the recording
  • Click on OK to save it to the Råstoff catalogue
  • TURN OFF all the microphones (ON-OFF buttons/slide faders all the way down, ON AIR lamp extinguished)

Playback

  • Activate “1PC lyd” mixer channel (slide the fader to the "0" position/press ON-OFF button)
  • Ensure that ALL Microphones are OFF (slide their faders all the way to the bottom/press ON-OFF button)
  • Adjust the volume for høytalerene if needed 2(the Monitor dial on the mixer board, bottom right)

Troubleshooting

No sound from the speakers in the studio

  • ALL microphones must be in the OFF position (white ON-OFF lights under all mic channels)
  • 1 PC Lyd channel (must be ON and in the "0" position (red ON-OFF light at the bottom of the channel slider)
  • The Monitor dial (høytaler volum) is turned up to the "kl.10" position
  • Still not working? Contact Ashley.

Record a telephone interview

  • The setup is identical to the basics as outlined above.
  • You will be adding an extra sound source, the BT channel (Bluetooth)

1. Link the mobile device to the mixer

  • Go to the Bluetooth settings on your device
  • Turn Bluetooth ON
  • In Studio 1: select AeroAudio BT 1
  • In Studio 2: select AeroAudio BT 2
  •  Confirm that your device is using AeroAudio BT as its speaker and microphone after you connect!
    This is an issue for some Apple devices and you may need to manually change the speaker from "iPhone" to "AeroAudio BT"

2. Activate the BT channel on the mixer

  • Slide the fader to the "0" position OR press the 5ON-OFF button
Bluetooth mobil recording mixer
Activate the BT channel. Slide the fader to the "0" position or press the ON-OFF button

3. Get yourself ready before making your call

  • Activate your own microphone on the mixer
  • Put your headphones on
  • You will be talking via your studio microphone and listening via studio headphones.
  • You will only use the mobile device to make the call and end the call.

4. Call the interview subject

  • When they answer you will make the final adjustments to your setup
  • Adjust the sound level for the BT channel with the fader if it is too loud or too quiet.
  • Adjust your headphone volume if needed.

5. Activate your recording device